

First things first : this is not for those not so geeky and nerdy wannabes who just can't move away from the comfort of using a Mac or a Windows system. Not to say that Ubuntu or Linux is not a comfort zone; but you surely need an anchor to take you to the shore.
Now , if you've really worked on a project in J2EE, then you surely would have used an IDE ( hats off to you, if you've used notepad to work on a J2EE project ). NetBeans ? Well its not really a coffee making machine but an IDE ( God help you if you've never heard of it ).
Let's get serious now. Can we use NetBeans to develop a web application on the Ubuntu platform ? Yes , we can! ( what...who Obama ? , we are discussing Ubuntu here ) . NetBeans for Ubuntu in available in the 'Synaptic Package Manager' . You don't need a screenshot for this , do you ? The next thing you require is the Java Development Kit ( jdk ) .Just search for 'jdk' and install 'sun-java6-jdk'.
Now you need to have that web-server that you would use to deploy your application.Download Java EE 6 SDK Update 2 from the link provided at the bootom. Again an issue here ? How do you install a file with '.sh' extension. Well, its not rocket science. Just right click on th file and under the 'Permissions' tab , 'Allow executing file as program'. Now just double click on the file and 'Run' . Keep track of the GlassFish installation directory.

To start working on a project, launch 'NetBeans' . Use 'File' -> 'New Project'. Ready for a surprise! No 'Java Web' to choose from as an option. Well, things are again very simple. Just click on the 'Tools' -> 'Plugins'. Under the 'Available Plugins' tab, search for 'Java web' and mark it for installation. Don't worry about dependencies. Like the 'Synaptic' let 'NetBeans' take care of it.

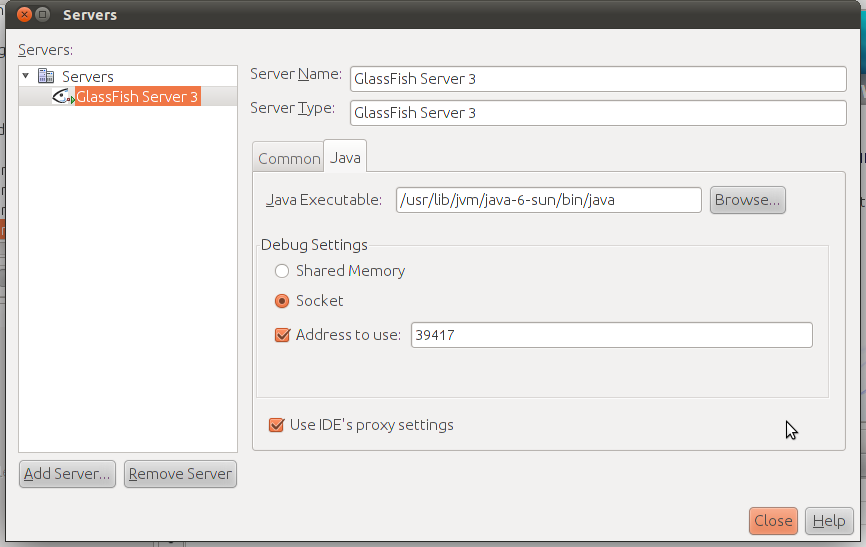
Now there are two more steps you need to perform to start working. You need to add a server. Go to 'Tools' -> 'Servers' and 'Add Server' . Choose 'Glassfish Server 3' . Provide the directory of the server ( I asked you to keep track of it ). Once the server is set , click on the 'Java' tab and provide the path to the 'Java Executable'. Well , I again come into the picture . This path is '/usr/lib/jvm/java-6-sun/bin/java'. You'll have to move one level up from your home directory to follow this path.
Yeah! It's finally over. Start working on an application now. I just did .
p.s : There's hardly anything that can not be accomplished on Ubuntu. Just take your time. You don't need to be an 'engineer' ( not one of those with that Er. prefix at least ) to accomplish this.
No comments:
Post a Comment